
In this guide10 sections
- 01Search the records first
- 02Ask people who know the property's history
- 03Observe likely areas without opening anything
- 04Do not confuse the valve with nearby equipment
- 05Understand what a visual check can establish
- 06Arrange a qualified identification when needed
- 07Record the result so it remains useful
- 08Separate the valve question from water symptoms
- 09Check Ottawa records and current requirements carefully
- 10Use a practical checklist for the next conversation
- ↗Official references
Before you begin
A safe records-and-observation checklist for homebuyers and owners who are unsure whether a valve exists.
Search the records first
Look for permit documents, invoices, inspection notes, renovation photographs and a home-maintenance log. Ask the previous owner or representative where the sanitary access points are, but treat an unverified statement as a question to confirm. A dated record that names the device and describes its location is more useful than a generic note saying plumbing was upgraded. Check whether documents refer to a backwater valve, a check valve, a cleanout, or other protective plumbing; similar-sounding terms are not proof that the same component was installed. Records can point an inspector toward an area, but they do not confirm that the assembly remains in place, accessible, correctly connected, or serviceable today.
Check that the address, approximate work date, and scope match the property. Plans may show an intended route rather than the final installation, and a later renovation can change what is exposed. Use paperwork to focus questions, not to skip an assessment when present condition matters.
Points to carry forward
- Search near the building sewer route, utility room and basement floor.
- Do not infer a valve from a generic cleanout or floor-drain cover.
Ask people who know the property's history
A seller, former owner, property manager, or renovation contractor may remember when drainage work occurred. Ask for the approximate date, location, contractor, permit or inspection details, and any maintenance instructions. Treat those answers as leads, not as verification: memory can be incomplete, and a renovation may have altered access or piping later. Request copies of records where available and note when a detail is not known. If several accounts conflict, preserve the difference rather than choosing the most reassuring version. A qualified plumber can compare the documents with the accessible plumbing and explain whether further investigation is needed to identify the device.
If the person who completed the original work is unavailable, do not treat that as evidence for or against the installation. Another qualified professional can review accessible information and state what remains uncertain. Ask for permission and practical arrangements before any inspection that may disturb the property.
Points to carry forward
- Ask who performed the work and whether records can be shared.
- Record unknown or conflicting details without converting them into facts.
Observe likely areas without opening anything
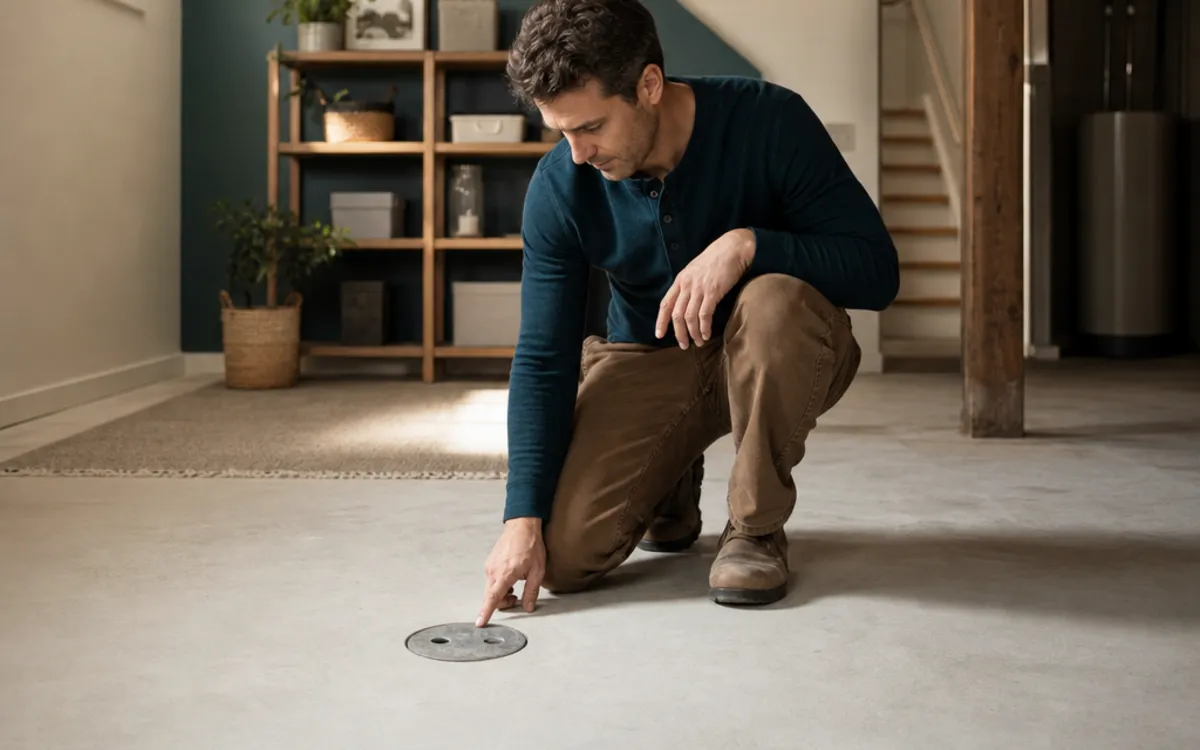
A valve is often associated with a sanitary building drain, and an access cover may be in a basement floor or utility area. Looking at the surroundings from a safe position can help plan an inspection: note visible labels, the cover's approximate location, nearby fixtures, and whether finished flooring or stored belongings obscure access. These are clues only. A cover can serve a cleanout or another plumbing feature, and the actual mechanism may be below the surface. Do not pry, unscrew, dig, or reach into an unknown opening to find out. If a cover is damaged, loose, wet, or emitting odour, keep clear and ask an appropriate professional how to proceed.
A photo can record what is visible without requiring a closer look; take it only if the location is dry and safe. Include a wider view that helps locate the feature, then a closer image from a safe standing position if useful. Avoid touching labels or clearing a cover when its purpose is not established.
Points to carry forward
- Photograph the cover and surrounding room for a professional.
- Do not lift a cover or disturb finishes to investigate on your own.
Do not confuse the valve with nearby equipment
Basements contain several components that can be mistaken for one another when seen only from above. A floor drain collects water from the floor, a cleanout provides access for drain service, and a sump pit collects groundwater for a pump. A backwater valve is installed in a sanitary drainage path to limit reverse flow. They may be close together, yet they do different jobs and cannot be substituted for one another. A cap, grate, round lid, or pipe stub does not identify its purpose. It is especially important not to assume that a sump lid or floor drain proves the house has sanitary backflow protection. Let the professional trace and identify the component.
A plumber may use records, visible piping, and safe access to explain which system a component serves. That identification should be documented so a later owner does not confuse adjacent equipment. If a component cannot be traced without opening a surface, ask what additional access would involve before approving it.
Points to carry forward
- Do not identify equipment by cover shape alone.
- Ask which drainage system each observed component serves.
Understand what a visual check can establish
A non-invasive walk-through can locate a possible access point and show whether it is obstructed by furniture or finished surfaces. It cannot reliably show the valve's internal parts, direction of installation, condition, or relationship to every fixture. Even a visible flap, if observed by a qualified person, is only one part of an assessment. A standard home inspection may be limited to readily accessible areas and may not open plumbing or test buried equipment. Ask what the observer actually inspected and whether the conclusion is that a device was seen, reported, or confirmed by records. Those are different levels of evidence and should be described accurately.
Ask whether the inspection was limited by stored items, a sealed cover, or finished construction. A report that carefully explains its limits can guide the next step without overstating certainty. For a purchase, share those limits with transaction advisers so they can consider timing and available contractual options.
Points to carry forward
- Separate visual clues from a confirmed device identification.
- Ask what the inspection did not access or test.
Arrange a qualified identification when needed
If the records are unclear or no safe, obvious access is visible, ask a licensed plumbing professional to identify what can be confirmed. Provide photographs and documents before the visit, and explain whether the question is simply whether a valve exists or whether its condition and serviceability also need review. Those are separate objectives and may involve different access or testing. Ask before the appointment what preparation is useful and whether any opening would require separate approval. Do not ask an inspector to certify a hidden assembly based only on a surface cover. A careful answer may be that the installation cannot be verified without further investigation; that is more useful than a confident guess.
Before agreeing to invasive investigation, ask what evidence it is expected to provide, the likely affected area, and whether restoration is included. The professional should explain the approval point for added scope. If the aim is only to locate a device, extensive work may not be necessary; if condition is the concern, identification alone may be insufficient.
Points to carry forward
- State whether you need identification, condition assessment, or both.
- Ask for the inspection limits and next steps to be recorded.
Record the result so it remains useful
When a professional identifies an assembly, ask for its location in terms a future owner can follow, the component's purpose, any visible identification, and how access is opened and maintained. Request photographs when appropriate and safe, plus a copy of the written findings or service invoice. If the device could not be confirmed, keep that conclusion explicit and note what would be required to resolve the question. Avoid replacing a qualified description with a vague file name such as basement plumbing. A simple drawing showing the accessible reference point can help future service, provided it is labelled as approximate and not mistaken for an engineered plan or exact pipe route.
Include a date and the name of the person who prepared the record, plus any model marking that was actually seen. Do not label a component as a valve unless identification was confirmed. Future workers can then distinguish an owner's note from a contractor's inspection finding.
Points to carry forward
- Save the professional's description with permit and service records.
- Label any homeowner sketch as approximate rather than authoritative.
Separate the valve question from water symptoms
Finding a valve does not prove that it caused a past wet-basement event, and not finding one does not identify the source of water. Sanitary backflow travels through the wastewater drainage system. Foundation seepage can enter through the structure, stormwater can collect outside or enter at openings, and a sump handles groundwater rather than household sewage. If the reason for checking is a prior leak, record where water appeared and which fixtures were affected, then have that pathway assessed separately. Avoid conclusions based only on colour, weather, or proximity to a floor drain. Different sources can overlap, and an inspection may need to consider more than one system.
Ask what evidence would distinguish a plumbing backup from water entering through the structure or sump system. Confirm whether the relevant area was examined and which conditions remain outside the inspection's scope. This prevents a device inventory from being mistaken for an explanation of every prior moisture problem.
Points to carry forward
- Describe the water's location and timing without assuming its source.
- Keep sump, foundation, storm, and sanitary investigations distinct.
Check Ottawa records and current requirements carefully
The City of Ottawa's backwater-valve page is a useful starting point for current permit guidance, and the Protective Plumbing Program page describes its own current terms. Neither page confirms that a particular property has a valve or that an undocumented installation meets requirements. If a property has work records, compare them with the current municipal process and ask the City or qualified professional about any unresolved permit or inspection question. Requirements and program details can change, and eligibility is property- and project-specific. Do not infer qualification from a neighbour's experience, the age of the house alone, or the presence of a cover. Save the source page and date checked with the property file.
If the home is outside Ottawa, confirm the rules of its own municipality rather than applying Ottawa guidance automatically. Program pages describe administrative conditions and may be revised; retain the current link and ask the City about property-specific questions. An existing valve or permit record is not itself a decision on future funding eligibility.
Points to carry forward
- Use current City pages for permit or program questions.
- Do not treat an online record search as confirmation of a device.
Use a practical checklist for the next conversation
Before calling, collect a short set of facts: the home's approximate age if known, visible access locations, available invoices or permits, prior service notes, and the reason the question matters now. Tell the professional which details are documented and which came from memory. Ask what they can identify during the visit, whether accessing the assembly could disturb finishes, what condition checks are possible, and what written record will be provided. If the concern relates to active sewage or a safety hazard, do not wait for a routine identification appointment; seek appropriate urgent help and avoid using plumbing until advised. The purpose of this checklist is to reduce uncertainty safely, not to encourage do-it-yourself excavation.
If access requires moving heavy furnishings, cutting a floor, or entering an affected area, ask who should do that and how it will be arranged. A professional can explain whether photographs and documents are enough for an initial visit. Keeping the task bounded helps avoid unnecessary disturbance while still reaching a useful answer.
Points to carry forward
- Bring records, observations, and a clearly stated inspection question.
- Escalate a live backup instead of waiting for a routine check.
Further reading
Official references
Rules and program details can change. Check the current source before making a decision about work on your home.
Continue reading
The next useful question.
When the question is about your home
An on-site conversation can clarify what a general guide cannot.