
In this guide10 sections
- 01Start with safety and observation
- 02Walk the exterior drainage route
- 03Check windows, doors and low openings
- 04Review sump equipment without guessing
- 05Keep sanitary access visible
- 06Review household readiness
- 07Record moisture and timing
- 08Distinguish thaw seepage from backup
- 09Plan repairs and official checks
- 10Finish with a repeatable seasonal record
- ↗Official references
Before you begin
A seasonal walk-through for checking access, sump equipment, exterior drainage and records as snow and frost change.
Start with safety and observation
Spring conditions change quickly: snow can melt while soil remains frozen, and water may collect in places that were dry through winter. Begin with a visual walk-through from safe, stable areas. Do not enter standing water, approach exposed electrical equipment in a wet space, or climb onto icy surfaces to inspect a roof or outlet. Note where snow remains, where meltwater travels and whether water is already entering the basement. A checklist is for observation and routine readiness, not a reason to open unfamiliar plumbing or handle contaminated water. If there is immediate danger, active sewage or a substantial electrical hazard, avoid the area and seek appropriate emergency or qualified help.
Keep people and pets away from unsafe areas until the hazard is resolved. A safe observation made later is preferable to a closer check that creates another risk. During rapid melt, conditions on one side of the house may differ from those near another entrance. Make observations from more than one safe vantage point, and do not treat a dry exterior route as evidence that concealed drainage is clear.
Points to carry forward
- Look from safe ground; avoid icy roofs, water and electrical hazards.
- Note the date, thaw conditions and visible water paths.
- Do not enter unsafe or potentially contaminated water.
Walk the exterior drainage route
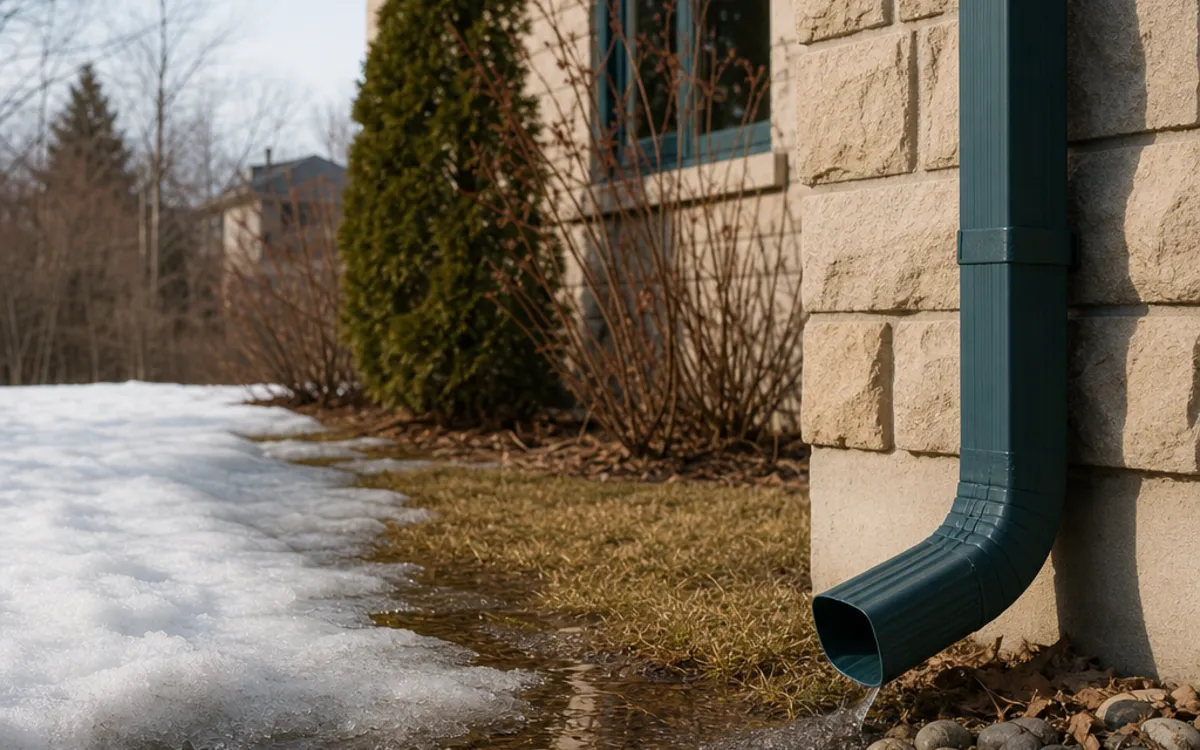
Look for downspouts that are disconnected, blocked by debris or ending beside the foundation, and note whether snow piles or temporary barriers redirect meltwater toward the building. Check visible grading for settled areas and watch for pooling after a thaw, without digging or changing drainage during the inspection. The proper discharge arrangement depends on the property, season and applicable local requirements; water should not be redirected onto a neighbour’s land or a public walkway. A frozen extension can trap water or send it back toward the house, so record what is visible and arrange safe correction if needed. Surface drainage observations concern rain and meltwater, not proof of sanitary sewer backflow.
Seasonal routes can change as snowbanks disappear and ground thaws. Note whether a condition is temporary or persistent, but let a qualified person determine whether a lasting alteration is appropriate. Where snow is piled against a foundation or over an inlet, record that condition rather than digging into frozen ground. As melt progresses, revisit the route from a safe position; blocked flow can become visible only after the surrounding snow recedes.
Points to carry forward
- Record pooling, erosion and downspout discharge locations.
- Keep discharge routes clear where safe and accessible.
- Ask before changing grading or redirecting water.
Check windows, doors and low openings
Inspect window wells, exterior stairwells, basement doors and other low openings from a safe position. Snow and leaves can obstruct a drain or create a small dam, while thaw water may run toward an opening from a nearby slope. Look for new staining, damp trim or sediment, and compare with prior photographs if available. Do not assume a clear-looking well is connected to a working drain, and do not pour water into an unknown drain as a test. If a cover, grate or drain needs repair, ask a qualified person to evaluate the location and its intended route. These entry points are part of the building-envelope and surface-water picture, distinct from wastewater plumbing.
Compare the same locations after later rainfall or thaw to see whether the visible pattern changes. Repeated observations can guide a focused assessment, while one inspection may capture only one set of weather conditions.
Points to carry forward
- Check visible wells, stairwells and low doors for obstruction.
- Photograph new staining or water marks when conditions are safe.
- Do not test an unknown drain by flooding the area.
Review sump equipment without guessing
If the property has a sump system, look for obvious changes such as an alarm, unusual noise, visible damage or water where it was not previously present. Confirm that the area is accessible and the discharge route is not visibly blocked, but do not remove covers, reach into a pit or alter wiring unless the equipment instructions and your qualifications permit it. Follow the manufacturer’s guidance for routine checks; when instructions are missing or the pump behaves differently, contact a qualified professional. A sump handles water collected by its connected drainage system and depends on its own condition, power and discharge. It does not prevent sanitary sewer reverse flow, and a backwater valve does not replace a sump pump.
If a pump is needed to control water, ask about the discharge route and how the system behaves during a power interruption. Do not improvise backup equipment or electrical changes without qualified advice. Find out whether an alarm is audible from occupied rooms and how occupants should respond if it activates. Do not silence or reset an unfamiliar alarm simply to stop a sound; note its indication and seek the instructions or service contact.
Points to carry forward
- Keep the sump area accessible and observe from a dry position.
- Use the equipment instructions or qualified service advice.
- Note alarms, unusual sounds, discharge changes or power issues.
Keep sanitary access visible
Locate known cleanouts and any backwater-valve access before seasonal storage blocks them. A cleanout is an access point to a pipe; it is not necessarily a valve, and different lids or covers should not be assumed interchangeable. Do not open an unknown, damaged or stuck cover just to check what is underneath. If a valve is known to be present, ask the installer or service provider for its inspection and maintenance instructions, including what household activity may be affected if it closes. Keep the surrounding area clear enough for a professional to reach it without moving heavy items in an emergency. Access readiness is useful, but does not establish that a device is correctly installed or operating.
A professional may need adequate working room and clear identification to service the correct component. Tell household members where confirmed access points are and which ones should remain closed unless service is arranged.
Points to carry forward
- Keep known valve and cleanout access clear of storage.
- Label confirmed access points without guessing their function.
- Arrange qualified service if a cover is damaged or inaccessible.
Review household readiness
Before the thaw period, identify where important shutoffs, electrical panels and drainage access points are located, but do not operate unfamiliar equipment under wet or unsafe conditions. Move irreplaceable or water-sensitive belongings away from low areas where practical, using stable storage that does not obstruct exits or service access. Keep a flashlight, charged phone and contact list available. Consider how household members will communicate if a room becomes unsafe, and know which local official channels provide current emergency instructions. Readiness reduces confusion; it cannot guarantee that water will not enter. Avoid making last-minute plumbing changes based on a checklist or generic online advice.
Keep the plan practical for everyone in the household, including people who may not know the equipment. Identify who can make decisions and who should be contacted if conditions become unsafe.
Points to carry forward
- Keep exits, panels and service access unobstructed.
- Move vulnerable belongings to safer locations where practical.
- Keep current professional, municipal and emergency contacts available.
Record moisture and timing
When you find dampness, record its exact location, approximate size, surface condition and date. Note whether it appeared during thaw, after rainfall, after fixture use or when a pump alarm sounded. Take photographs only from safe, dry areas and include a wider view that shows context as well as a close view. Odour, discoloration and residue can be useful observations, but should not be treated as proof of a particular source. Avoid cleaning away evidence before documenting it if doing so is safe and appropriate; contaminated water, however, should not be handled casually. A concise record helps an insurer or professional compare later events and can prevent different types of water entry from being conflated.
Note if cleanup, ventilation or other steps changed the appearance after the initial observation. Separating the original condition from later actions makes the chronology easier to interpret.
Points to carry forward
- Write down when and where dampness first appeared.
- Separate observations about fixtures, pumps and exterior conditions.
- Photograph safely and preserve records with dates.
Distinguish thaw seepage from backup
Water entering at a wall, window well or floor joint during thaw may point toward surface or groundwater conditions, but timing alone cannot establish the cause. Water emerging through a plumbing fixture or floor drain raises a different sanitary question. A sump that runs frequently, fails to discharge or loses power presents another system issue. Several conditions can coincide, particularly during wet weather, so note each symptom separately. A backwater valve is intended to limit reverse flow in the connected sanitary line under relevant conditions; it does not seal the foundation or remove groundwater. Likewise, exterior drainage improvements do not correct a sewer blockage. Get an assessment that follows the observed route rather than starting with a preferred product.
If signs point to more than one route, ask whether each needs a separate inspection. A combined explanation is more useful than treating every symptom as proof of a single failed device.
Points to carry forward
- Record whether water came through plumbing or the building envelope.
- Keep sump observations separate from sanitary-drain observations.
- Ask what evidence supports a proposed diagnosis.
Plan repairs and official checks
If the walk-through identifies a repair need, define the concern before arranging work: a blocked downspout, inaccessible valve, recurring window-well water and a fixture backup are not the same job. Ask what inspection is proposed, what access or disruption it requires and whether the work changes grading, plumbing or public connections. Ottawa provides current information about wastewater, backwater-valve permits and protective-plumbing programs; eligibility and requirements must be checked against the property and scope. Do not assume a rebate or permit applies because a neighbour or contractor had a different project. Preserve estimates, approvals, invoices and maintenance instructions. For active or unsafe water, follow appropriate urgent guidance rather than waiting for a seasonal checklist.
Use current official pages or contact the City for project-specific clarification before relying on a program. Application timing, eligible work and documentation are not established by this seasonal list.
Points to carry forward
- Match the work scope to the observed water pathway.
- Confirm current permit and program details with the City.
- Keep records of decisions, work and follow-up instructions.
Finish with a repeatable seasonal record
A useful spring checklist can be repeated without turning into a do-it-yourself plumbing inspection. Save a dated note of the exterior route, low openings, sump observations, sanitary access and any dampness; mark items that need follow-up and who is responsible for it. Compare the next walk-through with the previous one, especially after repairs or landscaping changes. Record uncertainty honestly: “not visible” is more helpful than a guess about where a buried pipe leads. Update property drawings only when supported by reliable information. This record can help a future professional understand changes over time, but it is not an engineering assessment, a maintenance certification or a promise of flood prevention.
Carry unresolved items into the next review rather than marking them complete based on a lack of visible water. Seasonal quiet may be useful information, but it does not verify concealed or untested components. Record dates of major snowmelt, rain and any landscaping or plumbing work alongside the observations. This makes year-to-year comparisons more informative, while keeping weather differences and the limits of visual inspection in view.
Points to carry forward
- Save each checklist with its date and observed conditions.
- Track unresolved items and the person or authority to contact.
- Update property records after confirmed work.
Further reading
Official references
Rules and program details can change. Check the current source before making a decision about work on your home.
Continue reading
The next useful question.
When the question is about your home
An on-site conversation can clarify what a general guide cannot.