
In this guide10 sections
- 01Do not bury the question
- 02Map the work before design is final
- 03Separate sanitary work from other water controls
- 04Coordinate permits and trade responsibilities
- 05Write access and restoration into the scope
- 06Plan inspection access before closing walls
- 07Discuss valve location and servicing
- 08Keep a renovation record that can be used later
- 09Questions to settle before signing off
- 10Use the City's information for current decisions
- ↗Official references
Before you begin
Why a renovation is a useful time to document drainage access, permit questions and future service needs.
Do not bury the question
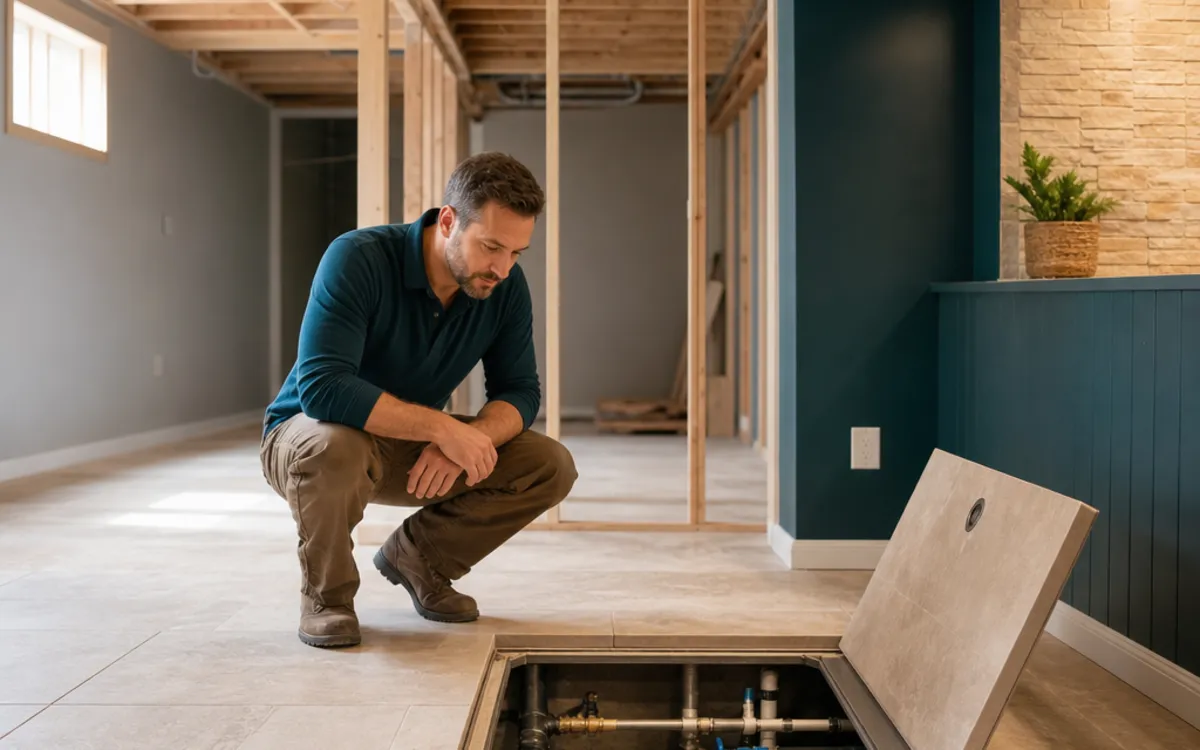
A basement renovation changes how easy it is to reach the plumbing and drainage components below or behind the finished space. Before flooring, framing, cabinetry or a utility enclosure is closed, locate visible sanitary cleanouts, floor drains and any suspected backwater-valve access. A cover that is obvious in an unfinished room can disappear under a permanent floor or built-in storage. The small planning effort now can avoid cutting into a finished surface just to identify what is there later.
Do not assume a round or square floor cover is a valve. It may be a cleanout, drain, sump cover or another fitting, and identification should be confirmed by someone qualified rather than by opening unknown components. Record what is positively identified and mark uncertainty as uncertainty. The goal is to preserve safe access and useful information, not to infer the home's complete drainage design from a few visible clues.
Points to carry forward
- Photograph pipe routes and access points before finishes are installed.
- Ask a qualified plumber to identify suspected valve and cleanout covers.
- Keep unknown components labelled as unknown in the renovation notes.
Map the work before design is final
A useful renovation plan starts with a simple map: room names, known floor drains, cleanouts, sump equipment, mechanical areas and locations where the sanitary building drain may run. The map is not a substitute for a plumbing drawing or a site assessment, but it gives the renovation team a common reference. Where plans are missing, a plumber can explain what can be verified visually and whether further investigation is worthwhile before walls and ceilings are closed.
Compare proposed walls, floor buildup, cabinetry and storage with the access locations. A valve access cover needs to remain findable and serviceable; a removable section of finish may be one solution, but its size and design should be agreed with the person responsible for future service. Avoid placing heavy fixed equipment or permanent millwork where it prevents access. Leave exact cover dimensions and clearances to the actual assembly and professional advice rather than relying on a generic diagram.
Points to carry forward
- Sketch known drains, cleanouts, sump equipment and utility routes.
- Overlay proposed walls and built-ins on the access map.
- Ask how a removable finish will be opened without damaging it.
Separate sanitary work from other water controls
A backwater valve is part of a sanitary drainage conversation. It is intended to limit reverse flow through a suitable sanitary drainage path under particular conditions; it does not manage every water source in a basement. A sump pump handles water collected in a sump basin, often associated with foundation drainage. Neither is a replacement for the other, and neither alone resolves roof runoff, surface grading, a leaking water service or all foundation seepage.
During renovation planning, keep these systems on separate lines in the scope. If the reason for considering a valve is a prior water event, first document where water appeared, when it appeared and what it looked or smelled like, without treating those observations as a diagnosis. Ask whether the concern is sanitary backflow, groundwater, stormwater entry, a plumbing leak or an unknown source. Correctly separating the suspected pathway prevents a renovation from treating a plumbing device as a universal basement-water solution.
Points to carry forward
- Identify sanitary, sump, foundation and surface-water items separately.
- Record water-event observations without declaring a cause.
- Ask which pathway the proposed work is designed to address.
Coordinate permits and trade responsibilities
Renovations can combine plumbing changes, structural alterations, electrical work and restoration of finished surfaces. These activities may have different approvals, inspection steps and responsible trades. Do not rely on a general article or a contractor's shorthand answer to decide whether a specific project needs a permit. Describe the actual proposed plumbing work and property circumstances to the City of Ottawa and consult current municipal information before the work begins.
Agree in writing who will confirm permit requirements, apply where needed, arrange inspections and provide records. The plumbing contractor's scope may not include framing, drywall, flooring, electrical changes or every permit-related task. Likewise, the renovation designer may not be responsible for verifying plumbing compliance. Clarifying roles early prevents gaps where each participant assumes someone else has checked. Keep municipal responses and approved documents with the project file, and ask the relevant authority what records should be retained for this particular work.
Points to carry forward
- Start with the City's current backwater-valve permit information.
- List who handles applications, inspections and finish restoration.
- Confirm scope-specific requirements with the City, not a neighbour.
Write access and restoration into the scope
A useful written scope names the known access points and explains what will happen to each one. It should say whether an access cover stays exposed, receives a designed removable finish, or is relocated as part of properly reviewed work. It should also make clear who protects the area during construction and who restores finishes after plumbing inspection or service. These details are easy to overlook when a contract describes only the visible room finish or the installation of a particular device.
Ask how the proposed arrangement will work in real use: can the cover be located without moving heavy furniture, can a service person reach it, and can it be opened without damaging tile or flooring? Do not approve a permanent concealment just because the surface looks cleaner. Aesthetic choices are legitimate, but the access solution should be deliberate and compatible with the actual plumbing assembly. If the project changes, update the written plan and photographs so the final record matches the home.
Points to carry forward
- Specify who preserves access and who repairs finishes after service.
- Confirm furniture and built-ins will not block the service area.
- Update the scope when plumbing or finish plans change.
Plan inspection access before closing walls
The required inspection sequence depends on the work and current rules, so confirm it for the project rather than assuming a particular inspection will occur. Where an inspection or test is required, the work may need to remain visible until the appropriate person has reviewed it. Closing a ceiling, wall or floor too early can mean reopening the finish, delaying the schedule and paying for avoidable restoration. Make inspection timing part of the construction sequence and communicate it to the trades responsible for covering the work.
Ask the plumber or project lead what should be photographed before concealment and whether photographs supplement or do not replace an official inspection. Keep the answer specific to the project. A photo can help explain what is behind a finished surface, but it does not itself prove approval or compliance. Store dated images with plans, invoices, permits and inspection paperwork. A future owner or service provider will benefit most when the records identify the room and feature shown rather than relying on unlabeled images.
Points to carry forward
- Confirm inspection timing before any work is concealed.
- Ask whether photos are useful in addition to formal records.
- Label images by room, date and the feature shown.
Discuss valve location and servicing
If an existing valve is found or a new installation is being considered, ask the plumbing professional to explain the selected location in relation to the home's sanitary drainage layout. A valve's performance and serviceability depend on the actual system and installation, not simply on placing a device near a floor drain. The professional should identify which fixtures or branches are affected, what access is needed and how the device is expected to be checked. Request plain-language explanations of any limits that matter in the home's layout.
A valve is a mechanical component that may need inspection and cleaning. Renovation plans should preserve the ability to reach its cover and should not treat a sealed or hidden access point as maintenance-free. Ask who will explain routine care, what warning signs call for service and whether there are instructions specific to the installed assembly. Do not dismantle or adjust the device based on a general illustration. Keep manufacturer information and installer records with the property documents so future work starts with the correct model and history.
Points to carry forward
- Ask which branches and fixtures the valve is intended to protect.
- Get model-specific service instructions and access expectations.
- Do not alter the valve or cover based on a generic diagram.
Keep a renovation record that can be used later
At project closeout, assemble more than receipts. Keep the final plumbing scope, any available drawings, municipal permit correspondence, inspection records, invoices and labelled photographs together. Note where access covers ended up after the finished floor and cabinetry were installed. If the precise route of a buried pipe remains unknown, write that down instead of turning an assumption into a fact. A clear record saves time when a future plumber, insurer or buyer asks what was changed.
Include a short home-specific service note: which access points are known, who installed or assessed the equipment, and where instructions are stored. Avoid recording private security details in a document that is shared casually, but make the relevant information available to authorized service providers. Update the record after any later plumbing alteration, repair or change to the finished space. The map is most valuable when it reflects the current home rather than an outdated renovation drawing.
Points to carry forward
- Store permits, inspection records, invoices and labelled photos together.
- Record unknown pipe routes rather than guessing at them.
- Revise the map after later plumbing or finish changes.
Questions to settle before signing off
Before accepting the finished basement, walk through the plumbing-related parts of the project with the person who performed or coordinated them. Ask what was changed, what remained untouched, where the service access is and what information is still uncertain. Confirm that covers can be located and opened, that no built-in feature blocks them, and that any required inspection or municipal closeout has been addressed. If the work differs from the original scope, ask for the final documents to reflect that difference.
No renovation checklist can decide whether a particular installation is compliant or suitable. If a detail is unclear, pause and get an answer from the City or the appropriately qualified professional before treating the work as complete. The questions below are prompts for that conversation, not technical acceptance criteria. A careful handover helps the household understand both the value and limits of the work, and makes future inspection less dependent on memory.
Points to carry forward
- Where exactly are the cleanout, valve access and sump cover?
- What changed, what was inspected and where are the records?
- Who should be contacted if an access point is damaged or blocked?
Use the City's information for current decisions
Ottawa's permit information is the appropriate starting point for municipal questions about backwater valves, but a general webpage is not a project-specific compliance determination. Requirements and program details can change, and eligibility for any municipal assistance or protective-plumbing program should be checked against the current official terms. A renovation may involve facts that a brief online summary cannot resolve, including the type and extent of plumbing work and the property itself.
Use the current City information when planning, then contact the City where the specific scope remains uncertain. Keep the date and substance of the answer in the project file. This guide is practical orientation, not legal, engineering or permit advice, and it does not establish that an installation is required or that a home qualifies for a program. The best renovation outcome is a finished room that retains responsible access, has a clear record, and leaves unresolved technical or municipal decisions with the people authorized to answer them.
Points to carry forward
- Check current City permit and program terms before committing to work.
- Save relevant municipal answers with the renovation documents.
- Treat this guide as planning help, not an approval decision.
Further reading
Official references
Rules and program details can change. Check the current source before making a decision about work on your home.
Continue reading
The next useful question.
When the question is about your home
An on-site conversation can clarify what a general guide cannot.